How to print images on wristbands with a wristband printer?
Leave a message
Printing images on wristbands can add a personalized touch to events, promotional campaigns, or even for personal use. As a trusted wristband printer supplier, we understand the importance of high - quality printing on wristbands. In this blog, we'll guide you through the process of printing images on wristbands using a wristband printer.
Understanding the Basics of Wristband Printers
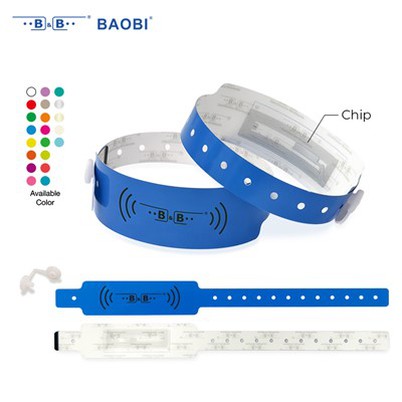
Before diving into the printing process, it's essential to understand the types of wristband printers available. We offer a range of printers, such as the Barcode Wristband Printer BB720A, RFID Wristband Printer BB720A UHF, and RFID Wristband Printer BB720A HF. These printers are designed to handle different types of wristbands and printing requirements.


The barcode wristband printer is ideal for printing barcodes, text, and simple graphics on wristbands. It's commonly used in events for ticketing and access control. On the other hand, RFID wristband printers can not only print images but also encode RFID chips embedded in the wristbands. This is useful for applications like cashless payment systems at festivals or access control in high - security areas.
Preparing Your Images for Printing
The first step in printing images on wristbands is to prepare your images properly. The quality of the final print largely depends on the quality of the original image.
- Resolution: Ensure that your image has a high resolution. A resolution of at least 300 DPI (dots per inch) is recommended. Low - resolution images will appear pixelated and blurry when printed on the wristbands.
- Color Mode: Convert your image to the CMYK color mode. Most wristband printers use the CMYK color model for printing, and converting your image to this mode will ensure accurate color reproduction.
- Size and Format: Adjust the size of your image to fit the wristband. Consider the dimensions of the printable area on the wristband. Common file formats for printing include JPEG, PNG, and TIFF.
Selecting the Right Wristbands
The type of wristbands you choose also plays a crucial role in the printing process. There are various materials available, such as plastic, silicone, and paper.
- Plastic Wristbands: These are durable and water - resistant. They are suitable for outdoor events and can withstand rough handling. Plastic wristbands are also easy to print on, and the prints tend to be long - lasting.
- Silicone Wristbands: Silicone wristbands are soft and comfortable to wear. They are often used for promotional purposes. However, printing on silicone requires special inks and techniques to ensure good adhesion.
- Paper Wristbands: Paper wristbands are cost - effective and are commonly used for one - time events. They are easy to print on, but they are not as durable as plastic or silicone wristbands.
Setting Up the Wristband Printer
Once you have prepared your images and selected the right wristbands, it's time to set up the wristband printer.
- Install the Printer: Follow the manufacturer's instructions to install the printer on your computer. This usually involves connecting the printer to your computer via USB or Ethernet and installing the necessary drivers.
- Load the Wristbands: Open the printer's wristband loading mechanism and carefully load the wristbands. Make sure the wristbands are aligned correctly to avoid misprints.
- Calibrate the Printer: Calibration is an important step to ensure accurate printing. Most printers have a calibration function that you can run to adjust the print head and ensure proper ink distribution.
Printing the Images
After setting up the printer, you can start printing your images on the wristbands.
- Open the Printing Software: Use the printer's dedicated software or a compatible graphic design software to open your prepared image.
- Adjust the Printing Settings: Set the print quality, color settings, and other parameters according to your requirements. You may need to experiment with different settings to achieve the best results.
- Print a Test Page: Before printing a large batch of wristbands, it's a good idea to print a test page. This will allow you to check the print quality, color accuracy, and alignment. Make any necessary adjustments based on the test print.
- Start the Printing Process: Once you are satisfied with the test print, you can start printing the wristbands. Monitor the printing process to ensure that everything is going smoothly.
Troubleshooting Common Issues
During the printing process, you may encounter some common issues. Here are some solutions to these problems:
- Blurry Prints: Blurry prints can be caused by a dirty print head or incorrect printer settings. Clean the print head according to the manufacturer's instructions and adjust the print settings.
- Ink Smudging: Ink smudging can occur if the wristbands are not dry before handling. Allow the wristbands to dry completely after printing. You can also adjust the ink density settings to reduce smudging.
- Misaligned Prints: Misaligned prints can be due to improper wristband loading or incorrect printer calibration. Check the alignment of the wristbands and run the calibration process again.
Maintaining Your Wristband Printer
Proper maintenance of your wristband printer is essential to ensure its longevity and consistent performance.
- Clean the Print Head Regularly: Use a cleaning solution recommended by the manufacturer to clean the print head. This will prevent clogs and ensure good ink flow.
- Replace Consumables on Time: Replace the ink cartridges, ribbons, and other consumables when they are running low. Using depleted consumables can affect the print quality.
- Store the Printer Properly: When not in use, store the printer in a clean and dry environment. Protect it from dust and moisture.
Conclusion
Printing images on wristbands can be a rewarding process, whether you are using them for events, promotions, or personal use. By following the steps outlined in this blog, you can achieve high - quality prints on wristbands using our wristband printers.
If you are interested in purchasing a wristband printer or have any questions about the printing process, we encourage you to contact us for further information and to discuss your specific requirements. Our team of experts is ready to assist you in finding the best solution for your needs.
References
- Manufacturer's manuals for Barcode Wristband Printer BB720A, RFID Wristband Printer BB720A UHF, and RFID Wristband Printer BB720A HF.
- General knowledge on wristband printing techniques and materials.