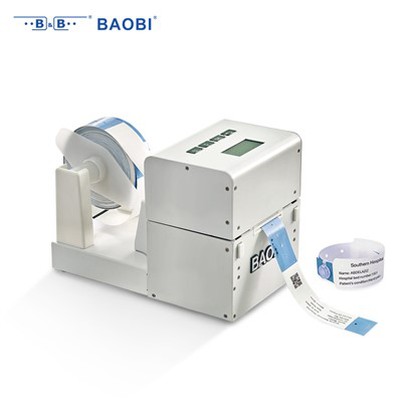
How do I install an RFID label printer?
Leave a message

As a supplier of RFID Label Printers, I understand that the process of installing an RFID label printer can seem daunting, especially for those new to the technology. In this blog, I'll guide you through the steps to ensure a smooth installation.
Step 1: Unpacking and Inspection
When your RFID label printer arrives, the first thing you should do is carefully unpack it. Check the contents against the packing list to ensure that all components are present. This typically includes the printer itself, power cord, USB cable (or other connectivity cables), ribbon (if applicable), and a set of user manuals.
Inspect the printer for any visible damage during transit. If you notice any issues, contact our customer support immediately. We take pride in providing high - quality products, and we'll work with you to resolve any problems.
Step 2: Choose the Right Location
Selecting an appropriate location for your RFID label printer is crucial. It should be placed on a stable, flat surface with enough space around it for ventilation. Avoid areas that are prone to dust, moisture, or extreme temperatures, as these can affect the printer's performance and lifespan.
Make sure the location is close to a power outlet and has easy access to your computer or network, depending on how you plan to connect the printer.
Step 3: Connect the Power
Once you've found the right spot, connect the power cord to the printer and plug it into a grounded electrical outlet. Make sure the power switch on the printer is in the "Off" position before plugging in the cord.
Step 4: Install the Printer Software
Most RFID label printers require specific software to function properly. You can usually download the latest version of the software from our RFID Label Printer website.
After downloading, run the installation file on your computer. Follow the on - screen instructions carefully. The installation process may involve accepting the license agreement, choosing the installation directory, and waiting for the software to be installed.
Step 5: Connect the Printer to Your Computer
There are several ways to connect an RFID label printer to your computer, depending on the model. The most common methods are USB and Ethernet connections.
USB Connection
If you're using a USB connection, simply plug one end of the USB cable into the printer and the other end into an available USB port on your computer. The computer should automatically detect the printer and install the necessary drivers. If it doesn't, you may need to manually install the drivers using the software you downloaded earlier.
Ethernet Connection
For an Ethernet connection, connect one end of the Ethernet cable to the printer's Ethernet port and the other end to your network router or switch. You'll need to configure the printer's IP address so that your computer can communicate with it. This can usually be done through the printer's control panel or the software.
Step 6: Load the Labels and Ribbon (if applicable)
Before you can start printing, you need to load the RFID labels and ribbon (if your printer uses a ribbon).
Loading Labels
Open the printer's label compartment. Most printers have a guide to help you align the labels correctly. Place the label roll on the label holder and feed the leading edge of the labels into the printer according to the printer's instructions. Make sure the labels are straight and properly aligned.
Loading Ribbon
If your printer uses a ribbon, open the ribbon compartment. Place the ribbon roll on the ribbon supply spool and thread the ribbon through the printer following the ribbon path diagram provided in the user manual. Attach the end of the ribbon to the take - up spool.
Step 7: Configure the Printer Settings
Once the printer is connected and the labels and ribbon are loaded, you need to configure the printer settings. This can be done through the printer software on your computer.
- Label Size and Type: Select the correct label size and type in the software. This ensures that the printer prints the labels accurately.
- Print Quality: Adjust the print quality settings according to your needs. Higher print quality may result in slower printing speeds.
- RFID Encoding: If you're using the RFID functionality, configure the RFID encoding settings such as the tag type, memory bank, and data to be written.
Step 8: Test Print
After configuring the settings, it's time to perform a test print. Create a simple label design in the printer software, such as a sample text or barcode. Then, send the print job to the printer.
Check the test print for any issues such as smudging, misalignment, or incorrect RFID encoding. If there are problems, review the settings and make the necessary adjustments.
Step 9: Troubleshooting
Even with careful installation, you may encounter some issues. Here are some common problems and solutions:
- Print Quality Issues: If the print is smudged or faded, check the ribbon tension and alignment. You may also need to clean the print head.
- Connectivity Issues: If the printer is not connecting to your computer, check the cables and make sure the printer and computer are on the same network (if using Ethernet). You can also try restarting both the printer and the computer.
- RFID Encoding Errors: If the RFID tags are not being encoded correctly, check the encoding settings and make sure the tags are compatible with your printer.
Step 10: Training and Support
If you or your team need further assistance with the installation or operation of the RFID label printer, we offer comprehensive training and support services. Our experienced technicians can provide on - site training or remote support to ensure that you get the most out of your printer.
Conclusion
Installing an RFID label printer may seem like a complex task, but by following these steps, you can ensure a successful installation. Our Barcode Wristband Printer BB720A and RFID Wristband Printer BB720A UHF are designed to be user - friendly and reliable, but we're here to help you every step of the way.
If you're interested in purchasing an RFID label printer or have any questions about the installation process, please don't hesitate to contact us. We're eager to discuss your specific needs and provide you with the best solutions for your business.


References
- RFID Label Printer User Manuals
- Printer Software Documentation